Ruby Made by Rae Pattern Review

I made another top a few weeks ago.  Yes I will get better so I am going to keep practicing.  After perusing around on Indisew.com I decided upon the Ruby top/dress by Indie designer Hoeskra of Made by Rae.

RubyPatternCover_800_large

source: MadebyRae.com

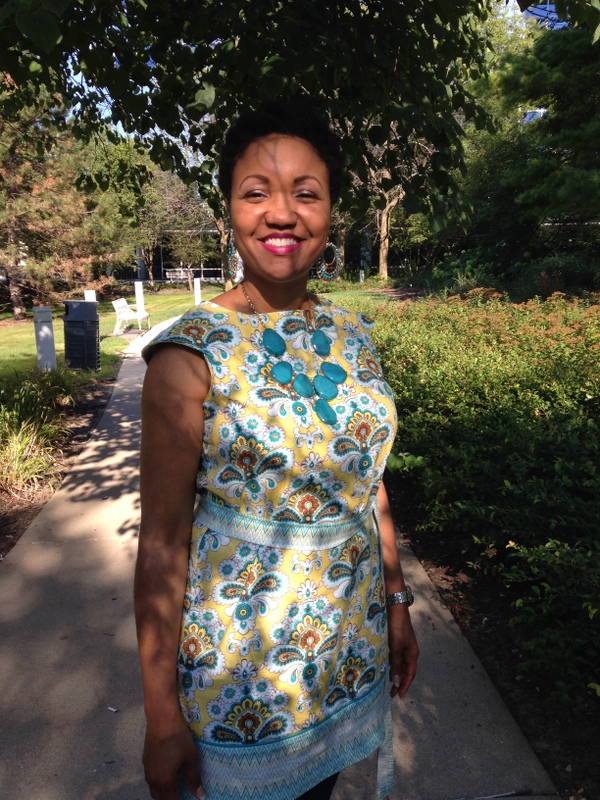
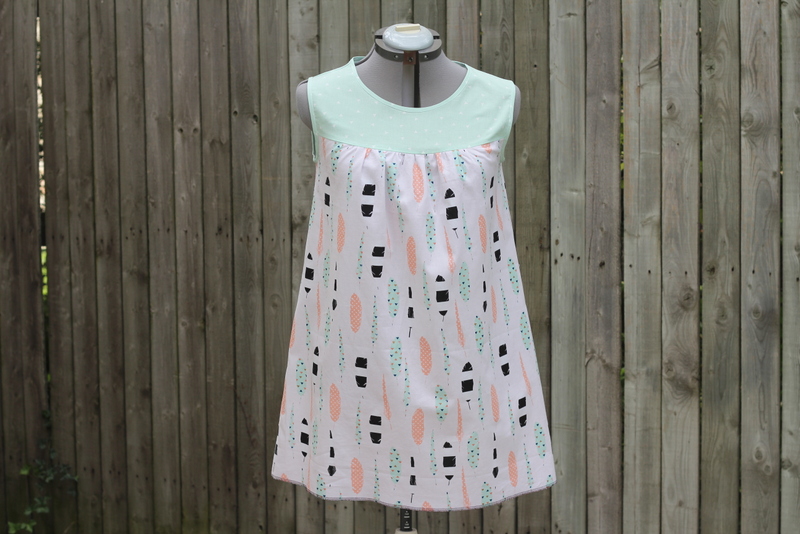
I really liked this pattern.  The pattern is visually pleasing, its color coded.  It is designed for the beginner so Rae has tried to make it as simple and non-intimidating as possible.Success!Rae offer several seaming options which speak to the absolute beginner or the experienced.  It actually gave me a refresher on the various seam options and how to execute them.  I felt as though I were gaining skills and learning new ones all at the same time.  I spent the majority of my time finishing my top and I am pleased with it!.The pattern can be made into a top or dress or as in my eyes a dress that I will wear as a top. So lets have  a look:

1-IMG_2269                             1-IMG_2270

Pattern can be purchased at  MadebyRae or Indiesew.com

$16.00 23 page PDF

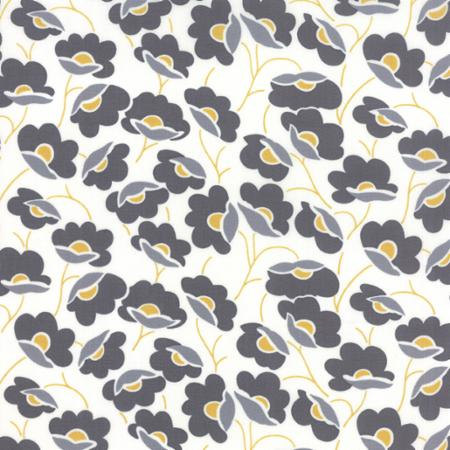
Farbric:  Hobby Lobby

WOULD I SEW THE SAILOR TOP AGAIN ? Yes!

Fabric

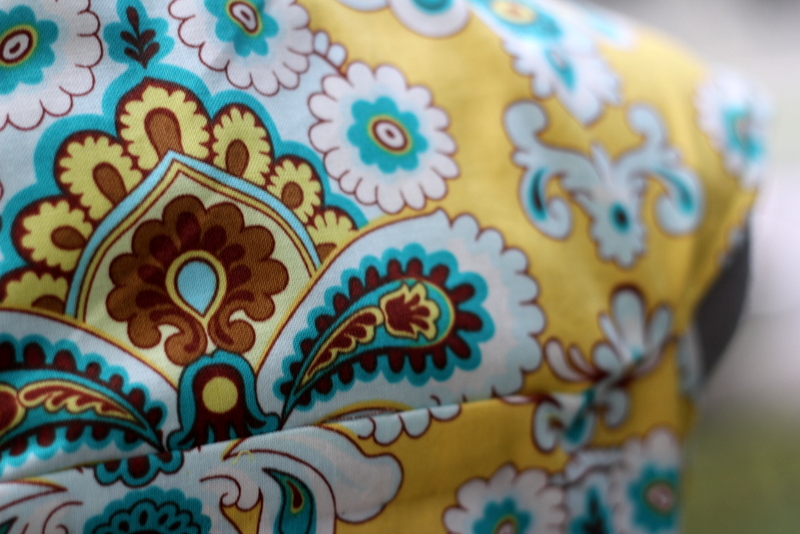
I scored these fabrics at Hobby Lobby.  I adore Hobby Lobby and I MUST stop when I see one.  I picked up this fabric and new it had to be for this top/dress.  This fabric is 100 percent cotton.  I prewashed on warm  and dried it in the dryer.  No fading, bleeding but it is not the softest.  I thought it would soften after washing, it did not.  so its pretty firm

Modifications:

Zilch…well unless you count the hem, I serged it:) and left it exposed.

Muslin:

1-IMG_2259

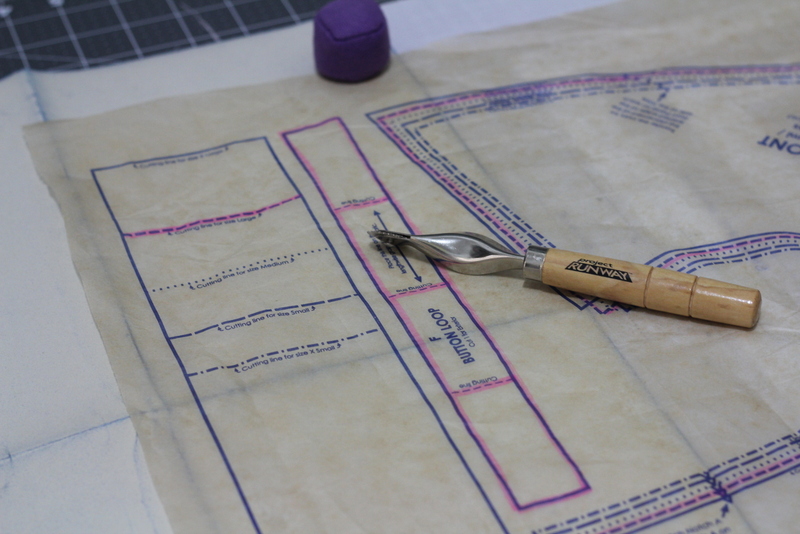
You remember the neckline from my sailor top..well that wasn’t going to happen again.  I finished my muslin and felt pretty good that I got it on and all was well. I can laugh now but I think I am impressed with making a muslin and have in my mind that is a “fake” garment that I am not using it for it’s true intention.  To allow for a  good fit.  I am happy I got the garment together when I should really be looking at and addressing any fit issues…alas next top!  The pattern is only a few pieces so it a quick sew.  Can you spot the issue?  The sleeve well the sleeve less……..right at the edge.  You see its over my shoulder….not sure what the technical part of that would be called.  My finished top is a tad bit over my armpit so I think I will make the medium bodice next time.  I am learning about my self looks like I need to make garments smaller in the shoulders than the bust.  Ha!  that is the joy of sewing and also the reality that everyone’s body type is different so patterns do not always fit exactly….google fit model and you will see.

Lets us all Gather…I learned my lesson with my gather foot on my sailor top..it was a mess.  This time I took my time without my fancy dancy gathering foot and got perfect gathers.

1-IMG_9884

1-IMG_9888

1-IMG_9886.

Finishing

Based on the version you choose as your finish that’s where I spent the majority of my time.

1-IMG_9891 1-IMG_9890

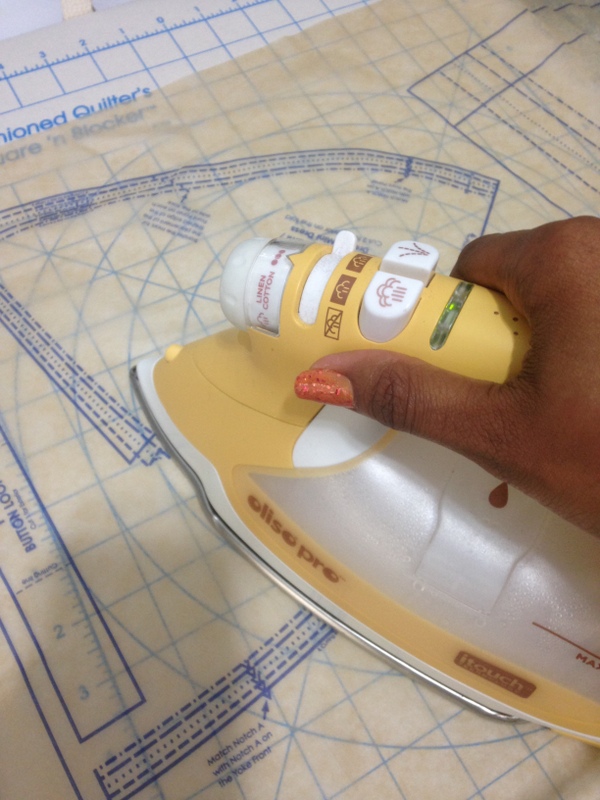
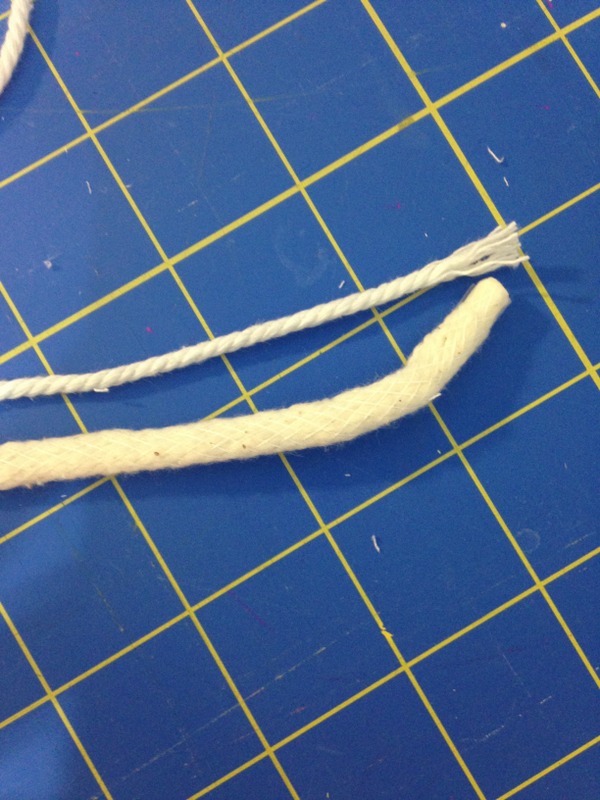
I chose flat fell seams and they took a while.  I definitely love the look but they do take some time.  I also chose the option to bind the armpit and the sleeves.  Now Rae does offer a non binding option with video but I chose to make the pattern as is.  Man Oh Man it was quilting all over, LOL.  I need a little clover binding thingie because woo to make teenie binding..fold it over..and the the death steam from the iron..ack!

1-IMG_9893

1-IMG_9896

1-IMG_9894

1-IMG_9897

Whew…That was something, lol.  Once it was all pinned….hurry up and wait…I was taking my time to ensure it was neat.

1-IMG_9895-001

1-IMG_9917

1-IMG_9912

Snapfu’s

The hem.  I wanted to use my serger on every garment to ensure I get comfortable right.  Well one tip I learned was to thread the serger with different colors until you are more comfortable so I did that….and it worked so I was serging along. Then all of a sudden it hit me..rats if I hem this you will see it thread since my thread is dark…whoops! So I left the hem down but serged.  That still makes me laugh.

Difficulties

None at all with this one.

It was windy when I took the picks but here are a few more.

1-IMG_9915 1-IMG_9919

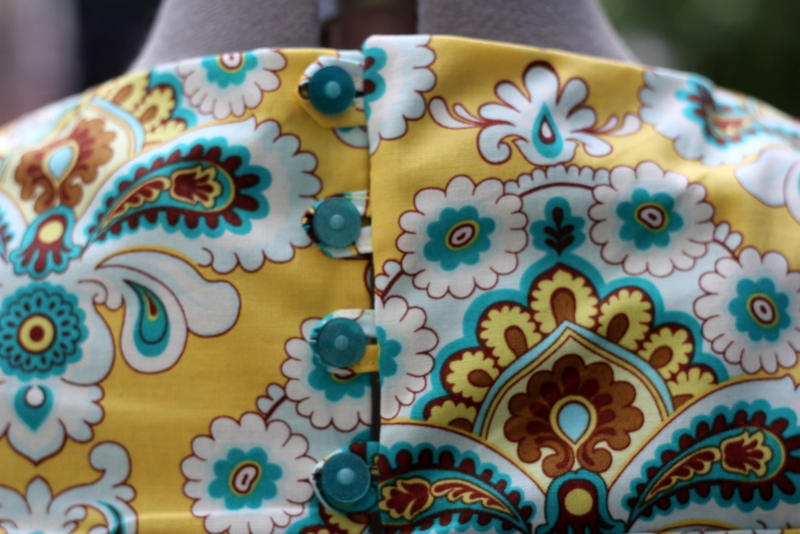
And this is how I wore it!  All hail to the cardigan!

1-IMG_9921

Ruby Dress Top designed by MadebyRae Highly Recommend!

Happy Stitchin’

Emonie


Fancy Tiger Crafts Sailor Top Review

Sailor Top-Cvr

Fancy Tiger Crafts Pattern $18.95 Indiesew.com PDF 16.00 Creative Bug Membership $4.95 pieces only video included

I have been sewing….ALOT. I was determine to better my skills so I am tackling it one project at a time. Since I am self taught I depend on the internet tutorials and classes. This time I decided to make the Sailor Top from Fancy Tiger Crafts via my Creative Bug Membership.  So I used the pattern pieces and followed the online video class.

1-IMG_2235

Overall

The ladies of Fancy Tiger describe the sailor top pattern as an easy-to-wear & easy-to-sew raglan sleeve top with a sweet gathered neckline. Its a-line shape is never clingy. This wardrobe staple is oh-so-practical for every day wear & looks great in many different fabrics. I agree with all the above. The pattern can be used with multiple fabrics and can easily get out of hand!  Meaning you can end of making a baziliion.

WOULD I SEW THE SAILOR TOP AGAIN ?ABSOLUTELY..I kinda have too

Since this was a quick sew I decided not to make a muslin…..not the best idea.    I did have fit issues and I want to be sure I get the pattern adjusted because I would love to sew several more.

FABRIC

1-IMG_9806

Cotton and Steel Dandelion from Craftsy.  I prewashed  my fabric for the first time with Aquae Soak.  The fabric had a substantial hand unwashed.  When washed it seemed to just melt and had great drape and was just as vibrant.

This was one time I was glad to have various marking tools this pink marker worked great.  Also the first time I traced right on the fabric.  Normally I would pin then cut but this was much easier.

Modifications

I made the size large for all pieces. Modifications NONE, Zilch!  This top was a front/back and two sleeves not much to  modify.  I normally lengthen my shirts nope not this tim..I let it be.

03-IMG_9864

First up sleeves! Wait…what?  yup you construct the sleeves first.  nothing to it.  Let finish the construction.  Using Rowenta travel iron is great pressing small pieces and it heats up super quick.

08-IMG_9869

Lets wrap this top up.  I was careful to make sure the seams matched too.

06-IMG_9867

I finished my side  seams with my serger a Brother 1034D this was my first time using it.  BUY IT NOW.

09-IMG_9870

                                      I added the yoke and that was it.  Yay time to try it on.

10-IMG_987114-IMG_9875

Ugh…..skued.  why is this puling to one side…..and back puckers.  Hmmmm UNDO. I took the from and back off. So how the Yoke was simply too big.  I guess that means I could have narrow shoulders?  Did I cut out the wrong size.  not sure.  I took the front and back loose.  I ended up having to put to darts in the back about 1/2” and then I was good to go.  So yes  I need to revisit this again.  This pattern is rated beginner plus since there are so few pieces but it s a lot of curves going on here. I don’t like to make the same thing twice so I will let it rest then revisit.  As I said its definitely a top I would like to have a few multiples of.

1-IMG_2237-001

The gathers are smooth.

1-IMG_2239-001

Now the back lie flat

1-IMG_2243

have to tell the photog husband to make sure my shirt is all the way down next time:).

01-IMG_2246 02-IMG_2247

And yes we always must have the bathroom shots, LOL.  When I wore my top to the office I had a cardigan on which I wear daily.

What I loved

Minimal pieces

flattering for all

great wardrobe builder

several reviews already

Second Thoughts

Should have made a muslin no matter how few pieces

Would like to make it longer next time.

Tools

Gathering Foot

How long to make?

one day

I will make this top again so stay tuned.  Happy Stitchin’

Toodles,

Emonie

Amy Butler Anna Tunic Review

02-IMG_9768

I adore Amy Butler!  I have made several of her bag patterns and skirt patterns.   This time I decided to make the Anna Tunic.

AB anna tunic

Pattern Review

I purchased my pattern …snap I can’t remember but its an old design and can be hard to find. Amazon has it though.  This is a tissue pattern with very few pieces.  Amy’s patterns I feel are for a confident beginner, full of graphics and yield beautiful handmade bags or garments.  As always I scoured the internet to see what overs had to say about the  fit, some said too high in the back, or that the sleeves where too tight.  I made sure to be-mindful of those trouble spots.  I made a muslin, my first one:) and finished the top in one day.  Tops are new to me , I’ve only made 3 previously and I am glad I made this one.  I recommend this pattern for a confident beginner.  Once you address any fit issues I think you will like this.  Next year I would like to make the dress version, too.

WOULD I SEW THE ANNA TUNIC AGAIN ?ABSOLUTELY

As I mentioned this was my first tracing a pattern and making a muslin.  I purchased medical exam paper and used some tracing paper   from the thrift store.  I watched a how to trace a pattern class by Heather Ross on Creative Bug on how to do it.

Fabric

26-IMG_9751

L-Joanns not sure of the name.  Its Cloud9 from their quilting section of the store.  R-Amy Butler French Wallpaper in Mustard

Piping was pre packaged from Joanns

Modifications

No lining-this is sleeveless I felt it was too hot.  My fabric was not sheer so I didn’t see it necessary.

21-IMG_9746

I ironed the pattern and began.

35-IMG_2165

I highlighted my size and transferred all the things!  I’ll admit I was really excited to try something new and to know I would get a really good fit.  My concerns were what I had researched too tight or gaping armholes, tight in the bust and too high in the back.

22-IMG_9747

25-IMG_9750

 23-IMG_9748

I sewed up the Muslin, tried it on and was satisfied.

1-IMG_9825 1-IMG_9828

I began sewing the top.  There are several curvy bits with this pattern use lots of pins silk pins are great because was able to sew right over them with no issues just take your time.  If your machine can not handle pins just go slow so you can pull them out.

30-IMG_9755

I wanted piping on mine so I glue basted the piping and attached it. The piping did leave a bulkly seam since I didn’t line it so I had to hand sew over that area.

27-IMG_9752

33-IMG_9758 34-IMG_9759

I used a flat felled seam….hehe I just had to look that up.  I didn’t know what it was called!

29-IMG_9754

The yoke can be confusion so I was glad I made a muslin fist. The buttons are really a nice touch too.

07-IMG_9773

Since I didn’t line it i have some bulk in this seam.  I don’t know how to use my serger so I didn’t use it.  I wasn’t quite sure what to do with that area so I whipped stitched down.  Not satisfied with it when I figure out the serger I will revisit this.

09-IMG_9775

I sewed the hem ok this was the first time I really realize that you sew the hem wrong side up.

1-IMG_2169

I  added the belt being careful to really match up the folds. And Done.

32-IMG_9757

02-IMG_9768

06-IMG_9772

17-IMG_9783

 15-IMG_9781

Tools Used:

Elmer’s washable glue with fine tip

1/4 piecing foot

Medical exam paper

Tracing Wheel

Pinking Sheers

Time it took to make:

Muslin and top one day.  Finished details the next day

What did I like about the pattern:

The result its a nice top.  Not many pieces, comes together quickly

Dislikes about the pattern

None

Snapfu’s

None

My Difficulties

No real problems just learning to work with curves.

All in all I enjoyed every bit.  I learned some new skills and have a great top to boot!  I tooks a few pics at the office but I had all kinds of crazy shading,

44-IMG_2205 48-IMG_2209 47-IMG_2208 45-IMG_2206

Toodles and happy sewing!

Emonie

Family Reunion Chi- Town Style

Oh how I have missed sharing my progress with you.  I have had so much going on!

One Minute update:  I had stem cell eye therapy this weekend so continue to keep me in prayer!  Initially it was VERY PAINFUL but everything is looking great at this stage in the treatment so Amen!

When the eye was behaving I was sewing…I mean some serious sewing.  I had 20 bags to make for a family reunion.  Afterwards I had to attach wood labels.  The reunion was held here in Chicago so all the bags were Chicago themed.  These fabrics hit the bill!

1-IMG_9636

I added the tags and all done.

1-IMG_9651

1-IMG_9648 1-IMG_9658 1-IMG_9662 1-IMG_9664


I hope the reunion was a memorable one I sure enjoyed being a part of it.  Happy Sewing to you.

Toodles

Emonie


Stella Sew Along- Week 2 Handles and Piping

1-IMG_9407


This bag is something!  I love the way its turning out.

Mom Update: She is all cut out but had a funeral to attend so I will put her updates in next week.

This week I added the piping around the  main panels and worked on the handles.

Piping:  This fabric I chose did not match any colors  so I had to make the piping.  Its more like a banana yellow.

5-IMG_1809


I ordered piping….note to self..read dimensions…piping on top is from prepackaged.  Rope is what I ordered as it was more for upholstery.

3-IMG_1737

So basically I unraveled what was in the pre packaged piping and removed the cording.  I cut my strips and started making my piping.

1-IMG_1735


2-IMG_1736


4-IMG_1790


I am getting better at making piping.  Here is the traditional way and here is the short cut way I used. Undecided on which method I like.  How about I was this close…..really????

1-IMG_1832

Another issue I had with the piping is I didn’t place my tape off center so I would have a clean seam.  Gotta work on that.

Handles:

Now the handles can be tricky so I drew my seams and followed the markings carefully. They are really firm due to using the Peltex 71 which made it a challenge to flip right side out…..but the results give you a nice and sturdy handle.  I would also like to make a fabric slide from Sew Sweetness.

1-IMG_1835

I used my 1/4 quilting foot to make even stitching on the handles.
1-IMG_1833

How cute are these scissors!

1-IMG_1837

Here’s where I made a modification: The pattern recommended putting an X across your handles I didn’t like the look of that so I did straight lines that reminded me of quilting.

1-IMG_9406I want these babies to stay…with no issues.  Next I had to figure out where I was going to put my label.  I figured it out.

1-IMG_9404

When sewing for myself I used my Emoniedezigns label that I ordered here.  This time I added a little placard to make it pop.  After all this work I NEED you to know that I made this!

1-IMG_9407

Alright see you next week!

Toodles,

Emonie


WIP it Wednesday

I have a bazillion works in progress ….so what’s new right? Here they go:

1-IMG_9329


Quince and Co. Haiku Crochet Shawl

1-IMG_9330


Serena Shadow Shawl

1-IMG_9377

3 Custom Bags

1-IMG_1712


Fiber handyed by me

1-IMG_1713


Three waters Farm can’t think of the colorway!

1-IMG_1709

Husband socks

1-IMG_1710

trench coat socks….

all done…for now. In fact this is all on hold until I finish my Sew’a long with my mom!

Toodles!

Emonie

Stella Sew-A-Long

May!  Definitely a sign of spring! Yasssss! Since May is the Month for Mothers I decided to do a sew along with my mom.  How cool is that!  I am sure we will work on this past the month of May but that’s ok.  Want to join us feel free.  Want to see the Bag….

Meet Stella.

Stella is a large fleece-interfaced travel bag featuring roomy cargo pockets, open side pockets, a large exterior zippered pocket and a removable strap. You’ll wonder how you ever traveled without her.(from the swoonpattern website)

Photo  Courtesy of Swoon Patterns

Photo Courtesy of Swoon Patterns

Its been a long time since I’ve made a bag on this scale but I am ready do dive in.  Since my mom is a garment sewer I will stay a few steps ahead of her and post our weekly progress. This will be my first Swoon  pattern also so I will review the pattern as well.  There are some lovely patterns on Swoon and we home to make a bag a month.  Swoon also has a wonder facebook community also.

Fabric Choices

Me:

Exterior: Jessica Jones:

Duskwildflower available at theneedleshop.

Source:: the needleshop Duskwildflower available at theneedleshop.


Lining:

V and Co Color me Happy from SecondCity Quilts

V and Co Color me Happy from SecondCity Quilts 

so stay tuned….Feel free to join us or start a craft a long with your mom this month.

Toodles!

Emonie


Sew Demented-Sew Together Bag

I have been sewing between eye aches. Last month while at the knitting pipeline retreat my husband picked out a pattern for me, the Sew Together Bag by Sew Demented.

1-IMG_9265

I decided that this would be the bag that would match my planner and hold my planner supplies, pens, stamps, hole punch, the important stuff.

The Pattern retails for $12.00 and is available in Paper and digital.

I started this Sunday night…..remind me to not sew after 10….I sewed the pattern to the bag..LOL.  MInd you I have the paper pattern this is on very heave glossy paper and about 8 pages folded double. I SEWED RIGHT THROUGH IT.  Total time 3 hours..fixing time:) 30 minutes the following day.  This little zippery gem is not for the beginner or the faint at heart but it is definitely work making.

1-IMG_9266

All Fabrics from Joanns mix of fatquarters and off the bolt.


1-IMG_9272

I think it matches my planner perfectly!  The main fabric comes in cream base and a white base.  Since the lining in my planner is cream and gray it looks fantastic.  The husband said, That looks sharp! I think he approves.

1-IMG_9271-001

Now for the meat of this little pouch remember I said zippery……tada…

1-IMG_9268

Yes 3 zippers inside!  You can’t help but be organized and after all that work you WILL use this.

1-IMG_9269-001

1-IMG_9270

I am delighted and I will make more.  Want to give it a try there is an excellent  sew along blog post from March 2014 that has excellent photos and I WISH I would have seen before I started.  I recommend this pattern for an intermediate sewists as there are very few photos and it assumes you have previous knowledge.  Do not be afraid of zippers and with the aid of the sew-along pictures you can do this!  I will keep you posted when I start my next one.

Toodles!

Emonie

P.S.  I have been loving some new sewing tools I want to share soon.

P.S.S. Chicago has a new quilt shop, Second City Quilts..this could be dangerous!

P.S.S.S. Eyes are still not well but better:)


Sweat Shop Sewing

My last few months have been filled with novelty fabric.  I was sewing bags for the Midwest Gaming Show  in collaboration with ReblImage …….and still battling my eyes.  Here are the results!

1-IMG_9197 1-IMG_9199 1-IMG_9201 1-IMG_9202Whew!  The show was this weekend and now time to move forward to stocking my shop!

See you soon! Toodles!

Emonie


PS. I am now on antibiotics for my eyes…..heading to a specialist this is going on too long:(.


The Eyes Have It!

Its Daylight Savings time here in the US where we lose an hour and changes our clocks.  Normally this does not affect me.  This time it was not the case.

This was me last week.

1-IMG_1449

Since returning from vacation I have had something going on with my eye.  Its been terrible.

Swollen

Sore to the touch

Itching

Burning

Waking up in the night screaming….eye tearing..can’t open it.

I went to the Dr and received ointment.  After it continuously felt as though something was in it I decided to see and Ophthalmologist.

Diagnosis:  Corneal Erosion and Severe Dry Eye

Me After Receiving: Suffering but glad is was not worse.

I was prescribed:

Ointment to put on the eye(takes some getting use too) 4-6 times a day

Artificial Tears-4-6 times a day or as many as needed

RX Drop-SaltWater Drops to heal the scratches and remove the water from the Cornea…yes Salt Water and Yes they B-U-R-N like Salt Water in your eyes.

Baby Shampoo-eyelash scrub with qtip-Yes it Burns too

Warm compresses 4-6 times a day

Well I got tired of heating up a Towel in the microwave so I decided to make a super quick rice pack.

1-IMG_1462

1-IMG_9109

I used this easy tutorial by Mommy Monologue.  I grabbed some scraps and made 2 one for the office and one for home.  If I didn’t have deadline sewing I could think of some other body parts I could soothe with cute rice packs.

1-IMG_9108

Keep me in your prayers.

Happy Sewing!